Cyberpunk 2077 is one of the most popular PC games. Everything is so good about this AAA title except for some minor bugs and issues that could spoil the gaming experience. Many players suffered from the abnormally high CPU usage like 99% or 100% when they were playing Cyberpunk 2077. If you encounter the same problem, don’t worry. This guide will show you exactly how to fix it.
Fixes to try:
Here are 5 methods to resolve the Cyberpunk 2077 CPU spikes. You may not try them all; simply work your way down the list until you find the one that works for you.
- Close unnecessary background programs
- Turn off overlays
- Adjust in-game graphics settings
- Change the power settings
- Update your device drivers
Fix 1 – Close unnecessary background programs
Programs running in the background like browser or anti-virus may interfere with Cyberpunk 2077 and result in the high CPU usage. So before gaming, you should shut down those unneeded programs to keep your system as clean as possible.
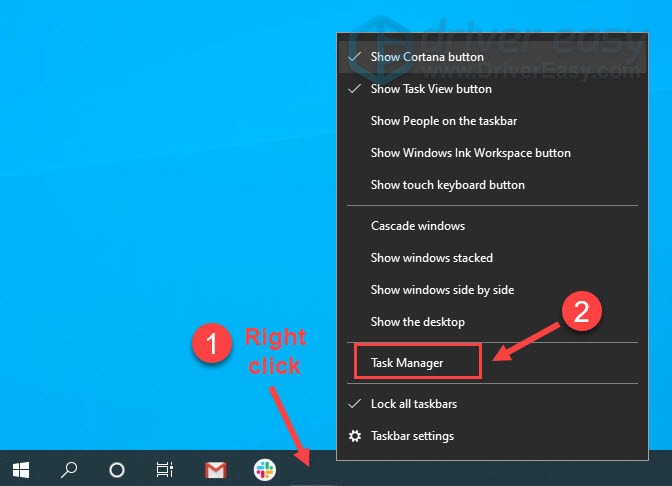
- Right-click any empty space on your taskbar and click Task Manager.
- Right-click each application in the list and click End task to close them one by one.

If there’re no background programs consuming your CPU but the problem still exists, check out the next fix below.
Fix 2 – Turn off overlays
The in-game overlay can also use up your CPU and cause high usage. To disable this feature, follow the instruction that corresponds with your gaming platform: Steam or GOG.
On Steam
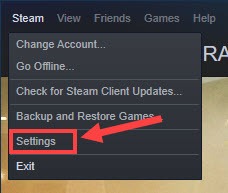
- Run the Steam client. Then, click Steam at the top left corner and click Settings.
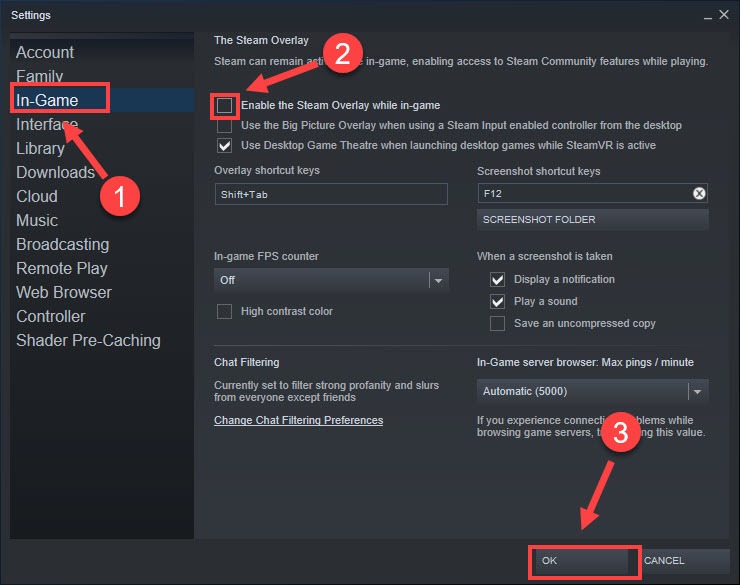
- Select the In-Game tab, untick Enable the Steam Overlay while in-game and click OK.
Check if Cyberpunk 2077 high CPU usage is still there. If so, proceed to Fix 3.
On GOG
- Open GOG Galaxy and navigate to the Library section.
- Click the gear icon at the bottom left corner.
- Uncheck the box next to In-Game Overlay and click Ok.

Restart Cyberpunk 2077 to check whether your CPU maxes out. If the CPU usage remains high while you’re gaming, try the next fix below.
Fix 3 – Adjust in-game graphics settings
Many players suggested that lowering certain graphics options in Cyberpunk 2077 will mitigate the heavy CPU bottleneck. Follow the steps below to make some tweaks to see if that does the trick.
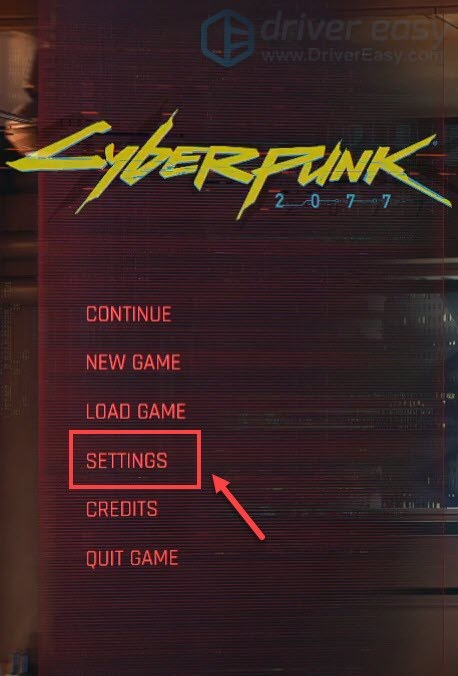
- Launch Cyberpunk 2077 and go to the Settings menu.
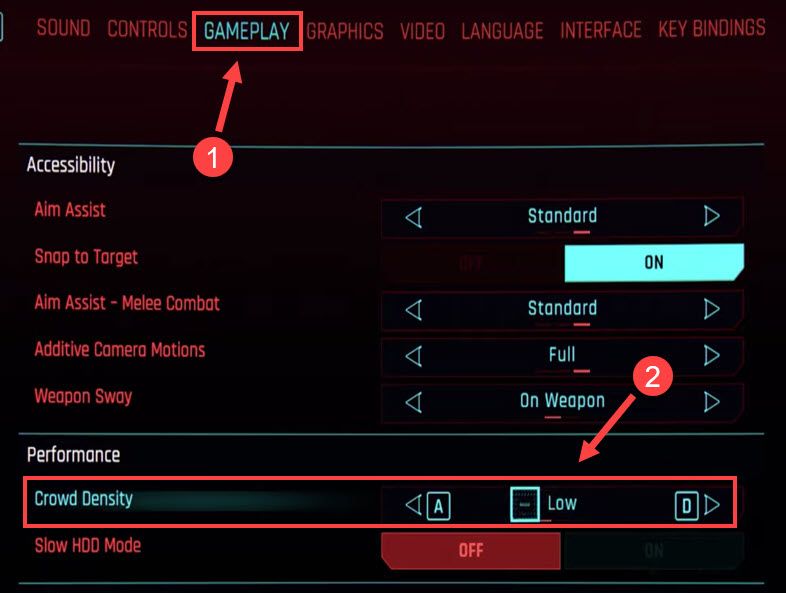
- Navigate to the Gameplay tab. Then, scroll to the Performance section and set Crowd Density to Low.
- Go to the Video tab.
- Under the Advanced section, turn off Ray Tracing.

- Scroll to DLSS and set it to off.

Relaunch the game to check if the issue persists. If yes, have a look at the next fix.
Fix 4 – Change the power settings
By configuring the power settings properly, you’ll be able to decrease the CPU load and increase CPU performance. Here’s how:
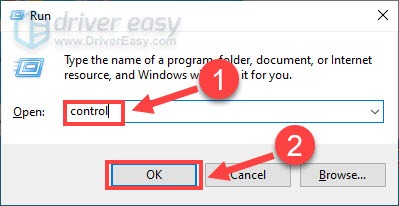
- On your keyboard, press the Windows logo key and R at the same time to invoke the Run command. Then type control in the field and click OK.
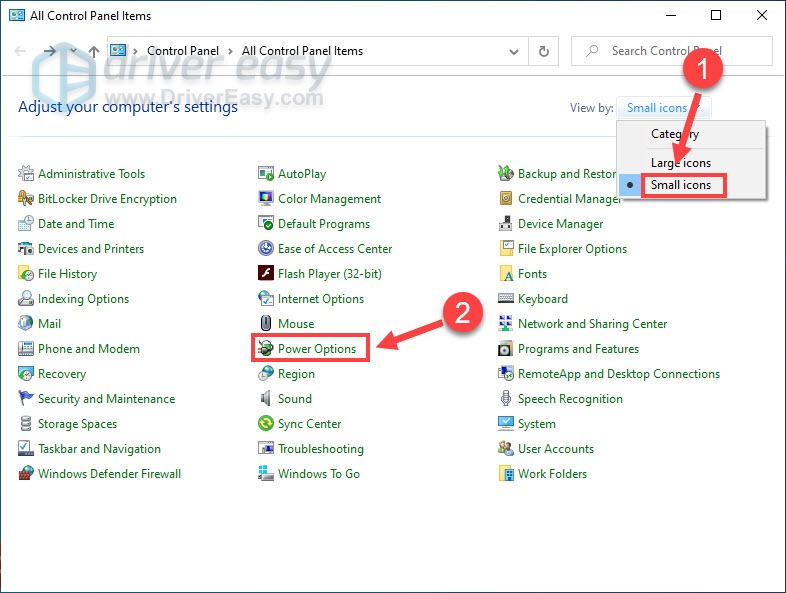
- Select Small icons next to View by and click Power Options.
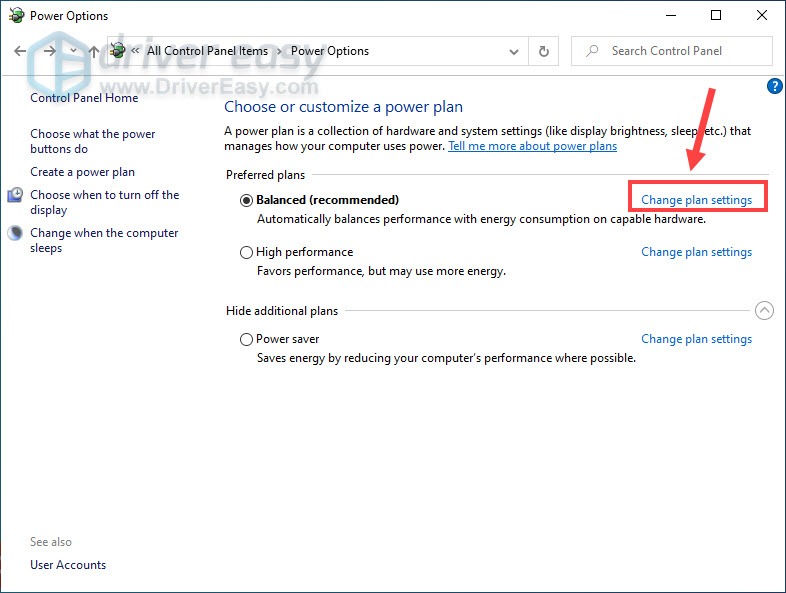
- Choose Balanced or High Performance mode if you’re facing high CPU usage, then click Change plan settings next to your chosen plan.
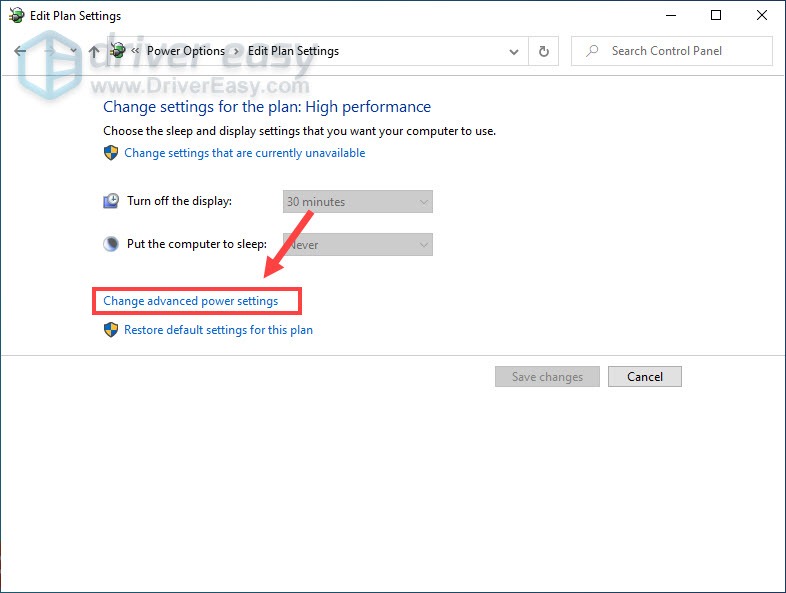
- Click Change advanced power settings.
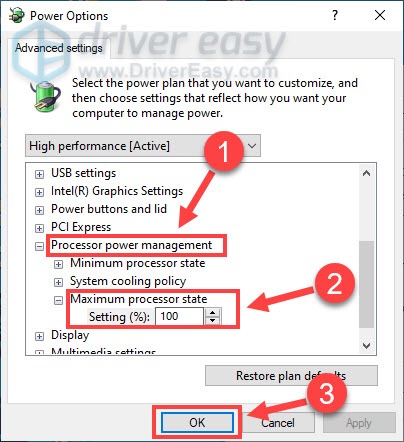
- Select Processor power management > Maximum processor state. Then, set it to another value no below 90%, and click OK.
Launch Cyberpunk 2077 to test. If it’s still using too much CPU, continue to the last fix.
Fix 5 – Update your device drivers
Cyberpunk 2077 high usage may occur if the device drivers on your PC are missing or out-of-date. If that’s your case, updating all the drivers could fix your issue.
There are two ways you can update the device drivers correctly:
Manually – You can update your device drivers manually by going to the manufacturer’s website, and searching for the most recent correct driver. Be sure to choose only drivers that are compatible with your Windows version.
Automatically (recommended) – If you don’t have the time, patience or computer skills to update your drivers manually, you can, instead, do it automatically with Driver Easy. Driver Easy will automatically recognize your system and find the correct drivers for your devices, and your Windows version, and it will download and install them correctly:
- Download and install Driver Easy.
- Run Driver Easy and click the Scan Now button. Driver Easy will then scan your computer and detect any problem drivers.

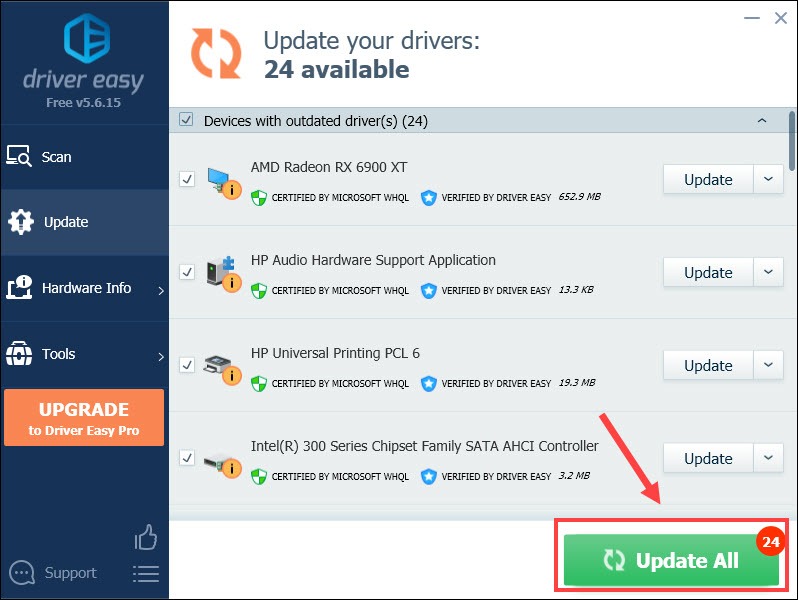
- Click Update All to automatically download and install the correct version of all the drivers that are missing or out of date on your system (this requires the Pro version – you’ll be prompted to upgrade when you click Update All). You can also click Update to do it for free, but it’s partly manual.
If you need assistance, please contact Driver Easy’s support team at support@drivereasy.com.
Cyberpunk 2077 should run better after the driver update and you might see the CPU usage in Task Manager goes down now.
Hopefully the fixes above resolve your Cyberpunk high CPU usage issue. If you have any questions or suggestions, feel free to drop a comment below.


